How To Install BMW E46 3 Series LED Tail Lights

Particular thanks to Bimmerfest Forum for the following magnificent installation guide.

Aftermarket LED Tail Lights 2

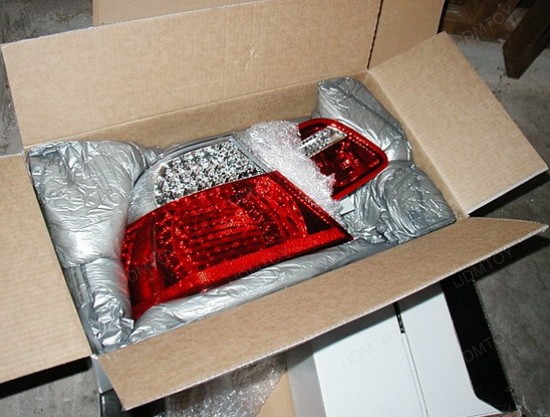
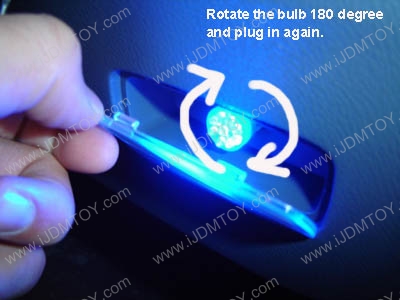
Before you start be certain you have 1-2 hours to dedicate to setting up these. They include resistor boxes and different wiring attached to them so you need to hide all this kind of stuff. The ONLY way to do it right is to remove the black trunk panel and both sides of the carpet lining (this particular might be folded back out of the way truly). Also before you start, simply unplug your factory lenses and plug in the new led ones to test to make sure everything features and you have no bulb out lights on the dash. Almost nothing worse than setting up an install and getting that the units were faulty to start with… yes it’s occured to me more than once with other items. Consequently here’s what you are starting with:

Aftermarket LED Tail Lights 2

First thing to do is to get rid of the tail lights you have on the car presently… there are actually just 3 nuts on the back, super easy. I won’t go into much detail about this particular. There are a lot of DIYs out there on this particular. Next pull out the trunk bottom carpet with the contoured black bottom thing. Subsequently pull back the trunk’s side carpets. If you have a friend you can certainly have him carry all those away from the way but I merely put something heavy in front of them so they couldn’t come forward. Currently you could begin removing the long black plastic liner on the back side of the trunk (shown in the bottom of the image at the incredibly back of the trunk). There are 4 screws below covers, and 5 push pin retainers if I keep in mind correctly. It genuinely allows you have one among all those interior clip/panel removers to move all the clips off, nevertheless it can be done with a screwdriver and some patience. Soon after you pull off the plastic panel you could start getting in the new LED tail lights.

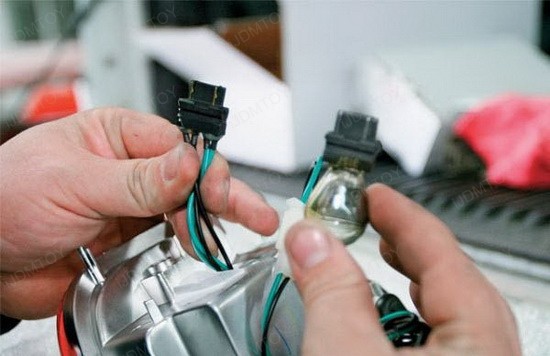
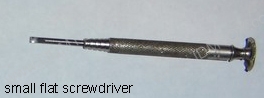
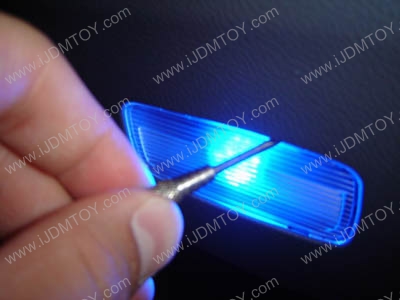
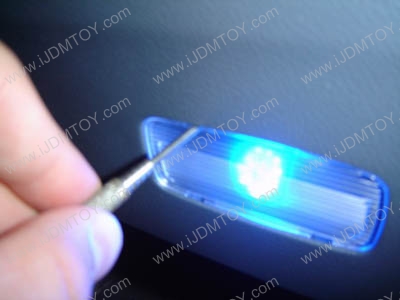
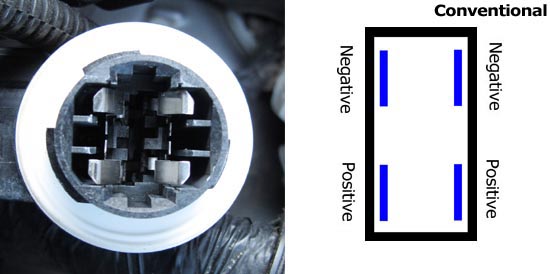
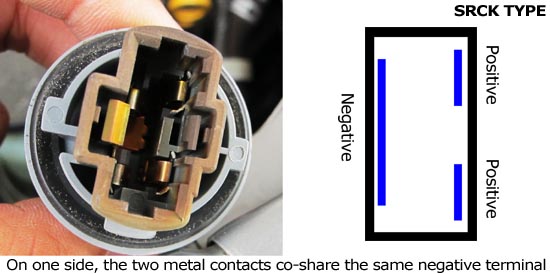
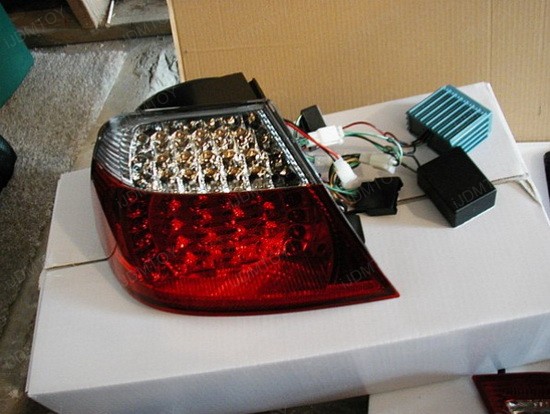
FYI… mark all the clips with a sharpie or a little something so you remember which ones go to which. Don’t attempt to mount the lenses with all the guts hanging off the back of them… it will probably help to make your life quite difficult and frustrating, inquire how I know. Also you need to make use of the black trim things off your recent tail lights and shift them to your new ones. The quickest way I could do it was to insert a little flathead screwdriver between and pry up slowly. You may possibly try spraying WD-40 on the fins that clip and then sliding it off… but I don’t know how well that would certainly work. I went with the screwdriver. Having these kinds of off your old lights and onto your new LED tail lights is likely the hardest part apart from yanking all the panels off the automobile. You can easily discover the black trim I am talking about on the exterior of the trunk on the left side of the graphic. Oh ya when you are installing the aftermarket tail lights really don’t put that third nut on the bolt right until you are willing to deploy the black panel back into the automobile. You could see I only have 2 of them on in the photo… the other you ought to put on after the black panel is on.

Aftermarket LED Tail Lights 3

Aftermarket LED Tail Lights 4

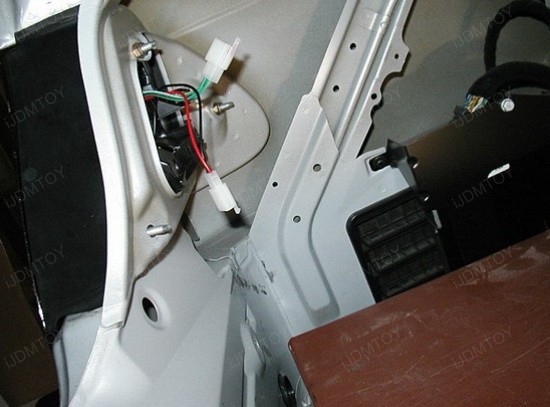
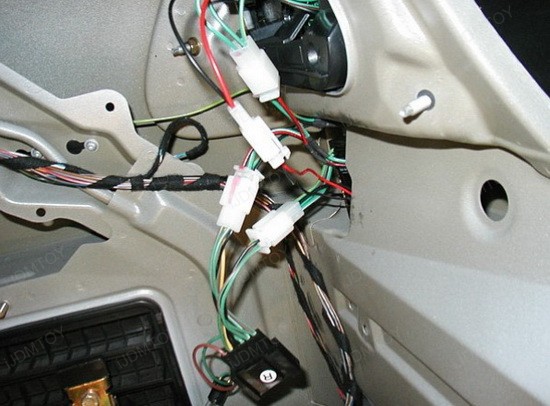
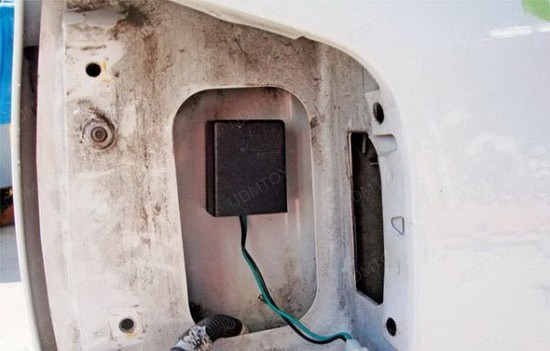
As soon as you get the LED tail lights in you could reattach all the guts to the back of them. Simply match the plugs you marked in the beginning. Appears like plenty of crap right? Well it is… along with it would certainly have been nice of the manufacturer to leave more wire at the aftermarket tail lights side so you may tuck and hide everything easier. Well, they didn’t… so you are stuck installing the boxes where I did… that small cubby beneath the lights that you find all the wires going into in the photo underneath. All 3 boxes are in there and match perfectly. Today plug in the lights and test all the performs again. Furthermore aim to attach the interior trunk light to the back of the light. This takes awhile to tuck all the wires somehow that it doesn’t interfere with the light. Although far better to do it now than when all your panels are going back on and in the way. The moment you obtain almost everything where you need it… time to put all those panels back on. This particular is self informative so I won’t get into that.

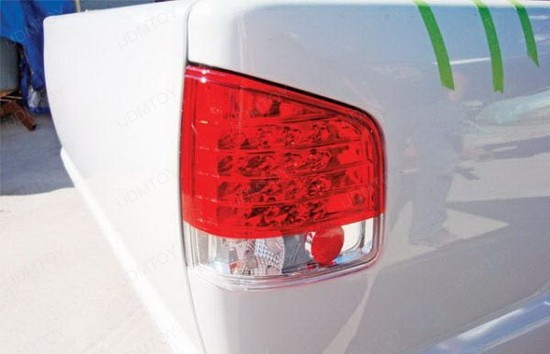
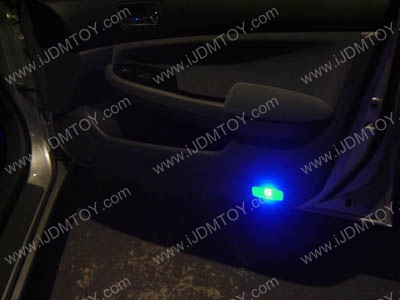
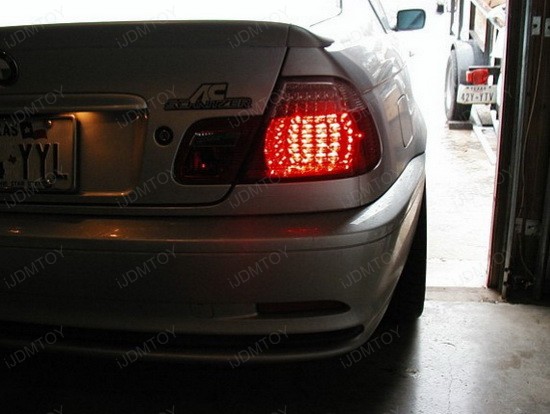
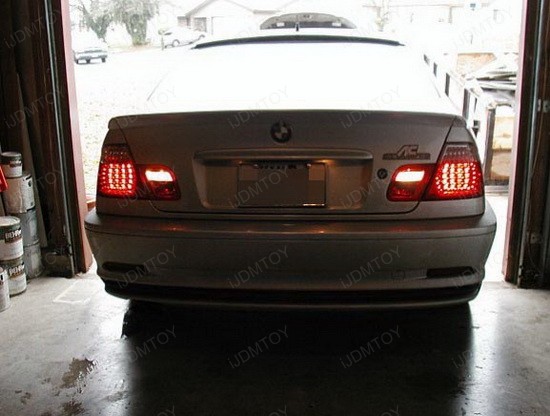
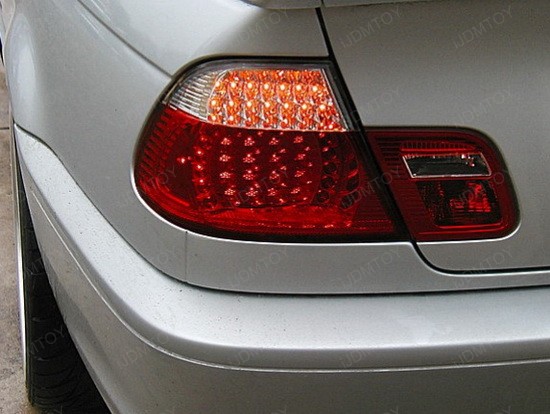
Right now you’re done, stand back and take pleasure in your new younger searching Bimmer… listed below are a bunch of my accomplished install photographs. Since for a full review… I am VERY satisfied with the LED tail lights. They are every bit as bright as the OEM ones and function just as well so far.

Aftermarket LED Tail Lights 5

Aftermarket LED Tail Lights 6

Aftermarket LED Tail Lights 7

Aftermarket LED Tail Lights 8

Halo Projector Headlights and LED Tail Lights

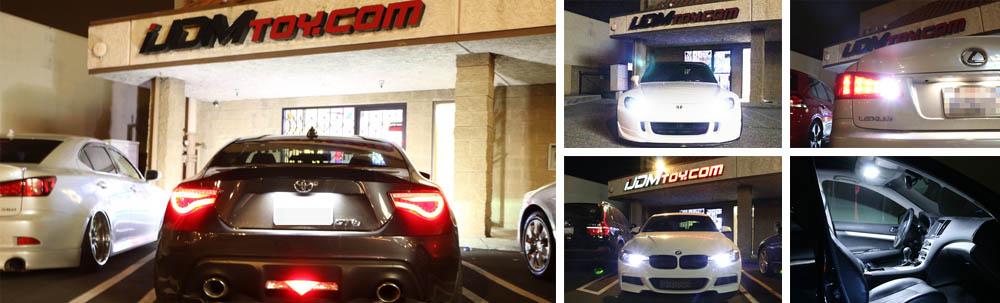
Introducing iJDMTOY’s new products for projector headlights, and LED tail lights.

How to Install Aftermarket LED Tail Lights

Installing LED Tail Lights is an excellent way to improve the appearance of your car exterior. Not only this, in addition, the LED tail lights will provide your a clean, custom look. Last but not least, the LED lights tend to last much longer when comparing with the traditional tungsten filament bulbs from regular tail lights.

Swapping stock tail lights for LED tail lights is not that difficult like it might appear. Simply follow this easy step by step guide to have the LED tail lights added to your ride and let other envy for what you have.

Aftermarket LED Tail Lights 2

Step 1: Remove factory tail lights assembly. The tail lights for most cars are simply bolted on from the inside of the trunk. You just need to remove the trunk carpet cover and un-bolts the tail lights. Slowly move the loosed tail lights a little by a little to have the tail lights removed completely. Do not hurry on this step, because you might break any clips that are used to hold the tail lights from inside.

Step 2: Remove all the light bulbs from the factory tail light housing and disconnect any wiring harness connected to the tail light assembly as well. I will recommend you use the scotch blue tape to write down the turn signal lights, brake lights, backup lights and put on each set of wires so later when you put them back, you won’t get confused.

Step 3: Take your LED tail lights out from the box and try to put the tail lights back up just to make sure this is the correct part/side before you put all the bulbs back in.

Aftermarket LED Tail Lights 2

Step 4: Connect the aftermarket LED tail lights with the factory wirings. For most LED tail lights, for example the ones we carry at iJDMTOY.com, most of the sockets and plugs are already designed to be simply plug and play. However, if there are any hard wiring required. Simply connect the stock red wire to the LED tail light red wire, and black wire to black.

Step 5: Before have the LED tail light completely bolt-on back, test it first. Test the brake light, test the turn signal light and test the backup lights to make sure everything works. If unfortunately one of them does not work, inspect the connection, because this is the most common reason for a lamp not lighting up.

Aftermarket LED Tail Lights 3

Step 6: Place the LED tail lights back into the original tail lights locations. Use the blue tape to hold the tail lights if you are doing this by yourself or have your buddy hold it for you so you can bolt it back. Don’t bolt the screw completely tighten in, because you want the tail light to completely back to the proper position, then tighten every screws.

Aftermarket LED Tail Lights 4

Step 7: That’s it and enjoy your aftermarket tail lights!

Aftermarket LED Tail Lights 5

Halo Projector Headlights and LED Tail Lights

Introducing iJDMTOY’s new products for halo projector headlights, LED tail lights and JDM decals.

Installation Guide for LED Side Door Courtesy Lights

You can find this product under LED Side Door Courtesy Lights

Tool Required: a small flat screwdriver.

Step 1: Use the flat screwdriver to open the side door courtesy light lamp lens.

Step 2: Take the stock tungsten bulb(s) out and directly replace back with the JDM LED bulb(s).

Step 3: Test it, it the bulb(s) won’t light up, please take the bulb(s) out,  rotate the bulb(s) 180 degree and re-install back again.

Step 4: Put back the side door courtesy light lens. Enjoy your beautiful LED side door lights.

Common troubleshooting for LED turn signal light bulbs

You can take a look at these LED bulbs under LED turn signal lights

What’s the difference between conventional pin configuration vs. the special SRCK LED bulb?

3157 Conventional Socket

3157 SRCK Socket

For 1156/1157/7507 bulb, in case the stock socket’s wiring are reverse, how to correct this

For 3157 or 7443 LED bulbs, in case the Dim mode and Bright mode are reversed, how to correct this without reversing the stock harness

For LED turn signal lights, add load resistors

Car LED bulbs fitment guide and car LED bulbs shopping guide

File out the car LED interior light inquiry form

Step1: Visit Osram Sylvania Lamp Replacement Guide to find out the bulb part # you need. (you will be redirect to Sylvania's website)

Osram Sylvania Lamp Replacement Guide

Step 2: Check the Cross reference

Common Part Number Cross Reference Part Number
1157 BAY15d 1016 1034 1076 1130 1154 1157 1158 1493 2057 2357 2397 7528 P21/4
1156 BA15s 1073 1093 1129 1141 1156 1159 1295 1459 1619 1651 1680 7506 7527 P21
7507 BAU15s PY21W
7443 7444 7443 7441 7440 T20
7440 992 7440 (A refers to Amber) T20 *7443 bulb is interchangeable to all 7440 applications
3157 3057 3155 3357 3457 4157
3156 3056 3456 4156  *3157 bulb is interchangeable to all 3156 applications
168 (T10) 194 147 152 158 159 161 168 175 184 192 193 259 280 285 447 464 555 558 585 655 656 657 1250 1251 1252 2450 2652 2921 2825 W5W PC175
2825 (T10) 2821 2823 2827
921 906 579 901 904 908 909 912 914 915 916 917 918 920 921 922 923 926 927 928 939
BA9s 64132 H6W
57 1895 53 182 257 363 1445 6253 64111
74 17 18 37 70 73 79 85 86 2721
211-2 (aka D42mm) 212-1 212-2 214-2 569 578 579
6418 (aka D36mm) 3423 3425 6411 6413 6418 6423 6461 DE3423 DE3425 C5W
DE3175 (aka D31mm) DE3175 DE3021 DE3022 3175 3022 3021

Car Bulb Diagram (move over the mouse to enlarge)

Step 3: Choose the LED bulb type

 
Output Each Emitter (lum)
Lighting Angle
Coverage
Lighting Quality
Value vs. Price
Sample Picture
Refractor LED bulbs High Power LED bulbs
20-22 lum 60-90 lum
150 degree 180 degree
Ok Very Good
Concentrated Lighting Even Lighting
Good Value Better Value
Refractor LED bulbs High Power LED bulbs
1210 Single Chip SMD LED bulbs 5050 3-Chip SMD LED bulbs
30-45 lum 80-100 lum
360 degree 360 degree
Excellent The Best
Wide Angle Flood Lighting Wide Angle Flood Lighting
Excellent Value The Best Value
1210 SMD SMT LED bulbs 5050 3-chip SMD SMT LED bulbs

Step 4: Which color should I choose?

Here are some recommendation:

Front Corner Lights Amber Yellow or Xenon White
Rear Corner Lights Brilliant Red or Xenon White
Parking Lights Xenon White
Sidemarker Lights Xenon White
License Plate Lights Xenon White (this is the only legal color for license plate lights)
Backup Lights Xenon White or Ultra Blue
Interior Lights Choose any color and express your personality!

Step 5: Search the store and shop, enjoy!

Search the store and shop, enjoy!

back to top

File out the car LED interior light inquiry form