2004 BMW 745Li Owner Picks the 3457 Turn Signal Bulbs

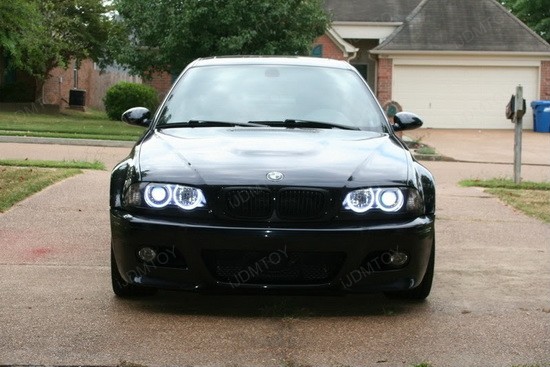
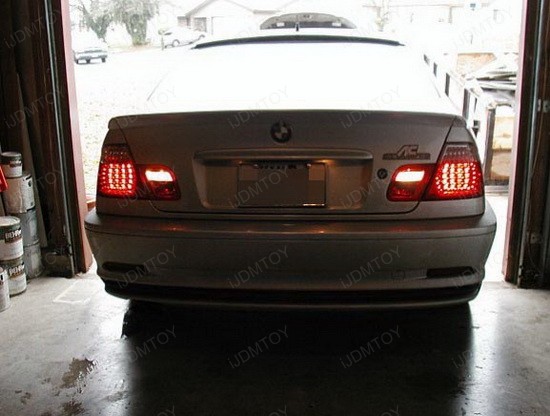
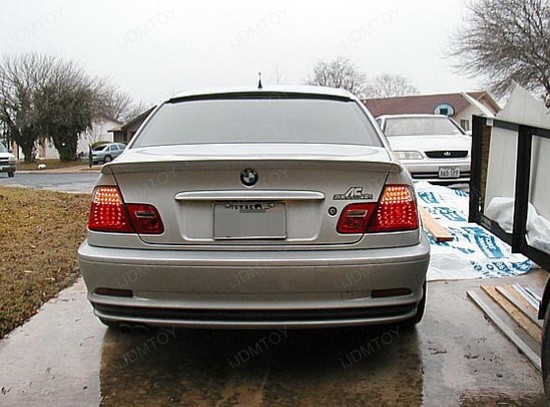
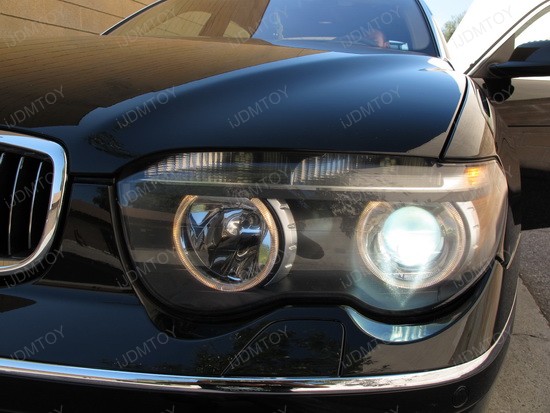
2004 BMW 745Li feels like a limo and if you wonder how to enhance its glamorous appearance, check out these 3457 Turn Signal Bulbs. BMW’s 7 Series is a serious road machine and has always been among the most luxurious models on the market, but it looks far more classy with LED lights for the front turn signals – a real state of the art LED equipped driving machine!

BMW 745Li Error Free 3156 LED Bulbs 1

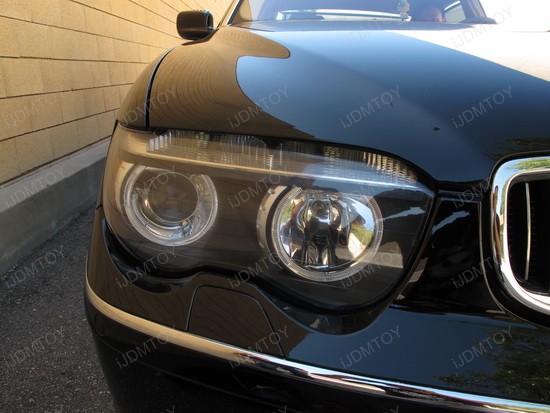
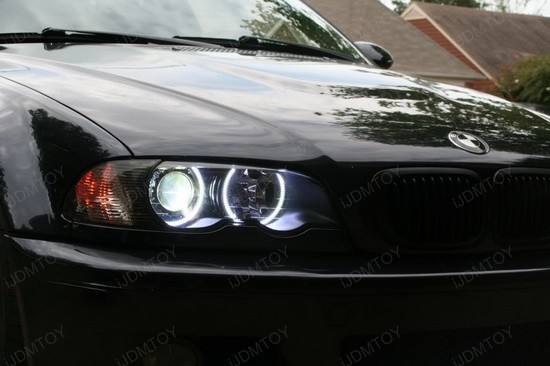
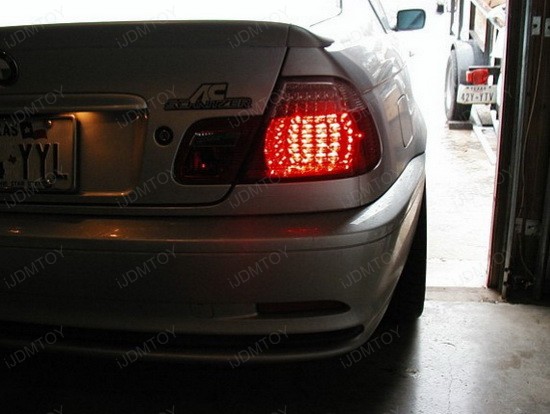
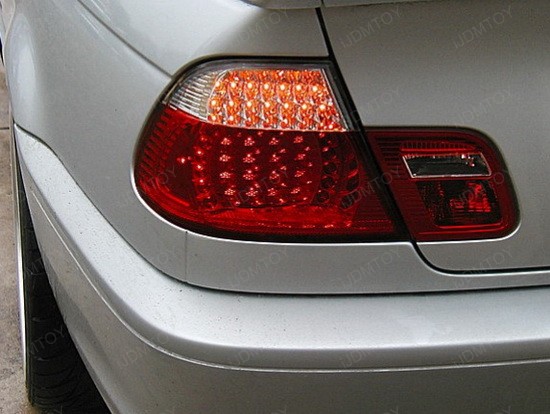
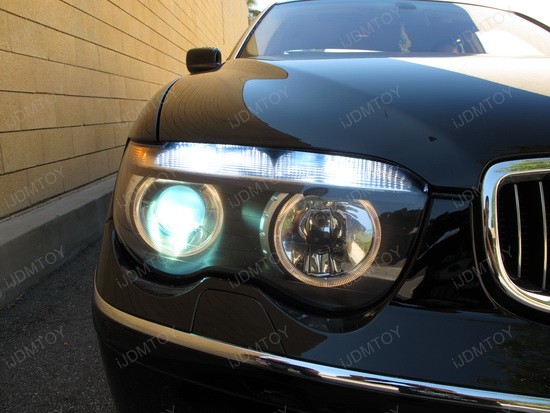
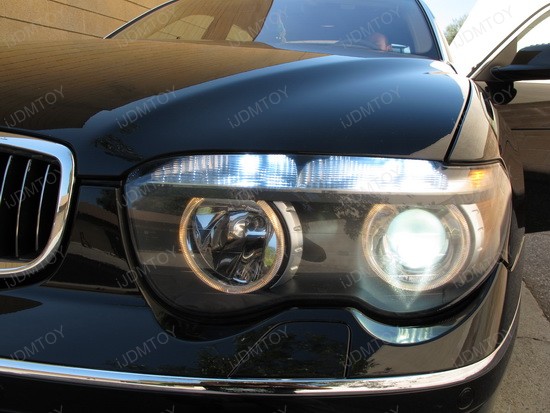
If you take a good look at the photos of the front turn signals, you just can’t miss the Error Free 3457 LED bulb in action – this stuff is great match to the HID headlights, which makes the 2004 BMW 745Li pretty significant. Some critics have faulted the new styling, especially the rear end, but I say the front end with 3457 Turn Signal Bulbs is very sporty and muscular.

BMW 745Li Error Free 3156 LED Bulbs 2

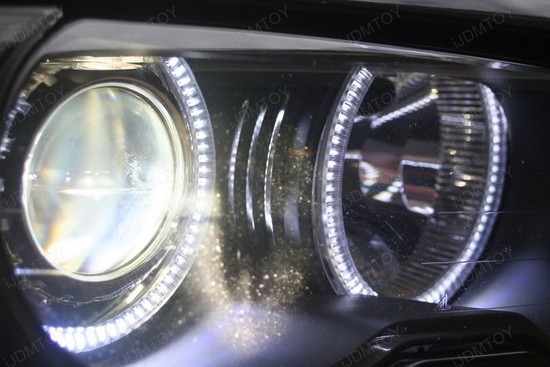
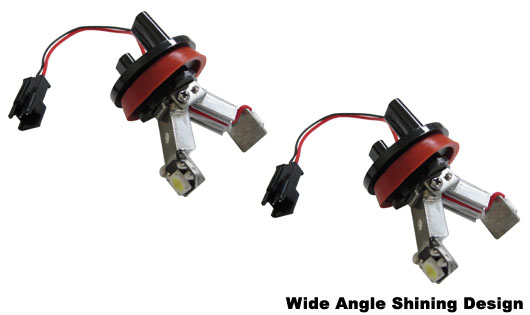
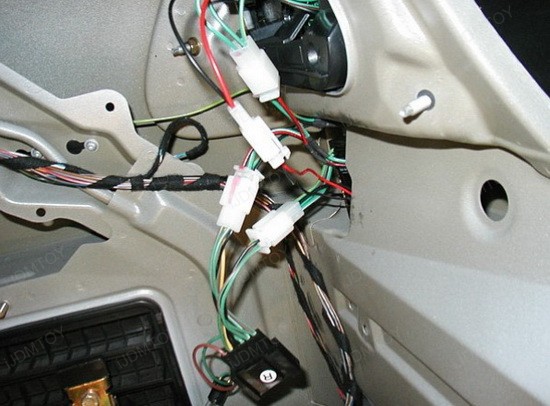
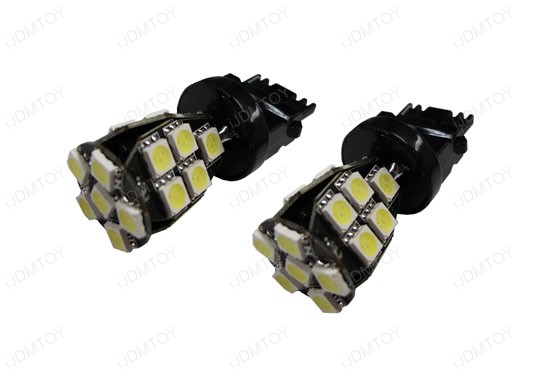
These Super Bright 21-SMD 5050 Single Filament Error Free 3156 LED Bulbs are completely plug and play! Even a non-experienced guy could replace the old yellow-egg look in just a few minutes. What’s more, this LED bulb is designed with load resistors to bypass all kind of error that could come up on the dashboard for European car such as BMW or Mercedes-Benz for front turn signal lights only. This means no hyper flash problems, too! However, please make sure you check out the compatibility list on the product page at the iJDMTOY store prior purchasing.

BMW 745Li Error Free 3156 LED Bulbs 3

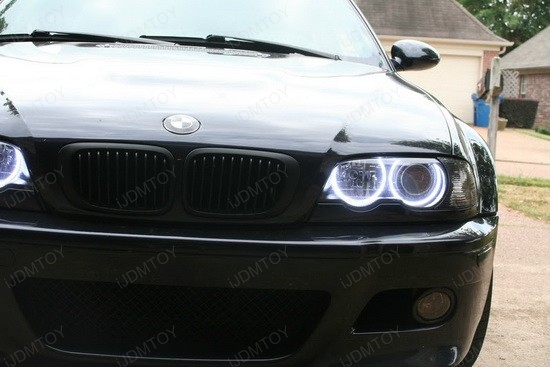
The featured 2004 BMW 745Li is customized with taste and you just can’t miss the super bright light of the 3457 Turn Signal Bulbs. The 21 pieces LED lights have superb lighting output and are very bright both daytime and night time. As we all know, bright and easy noticeable light means safety, which leads to the conclusion that if you have these LED bulbs, you’ll increase your safety by making the car visible from greater distance. If you are determined to tune up your ride, then you just can’t go wrong with these Error Free 3457 LED bulbs.

BMW 745Li Error Free 3156 LED Bulbs 4

Error Free 3156 LED Bulbs for BMW or Mercedes-Benz Front Turn Signal Lights

iJDMTOY Independence Day Sale

Brought to you by iJDMTOY.com, the expert for your Car LED. From July 1st to July 5th, we will have a 15% OFF sales to celebrate the Independence Day and the promo code is Patriot. Follow us on Facebook for exclusive promo codes.

Mean 2005 BMW M3 shines with BMW LED Halo Rings

Check out the super-duper cool 2005 BMW M3 – it has very nice custom BMW LED Halo Rings with stunning "fade on" and "fade off" effect. These BMW E46 3 series LED Rings are extremely bright and really set this M3 apart from all other bimmers on the street.

BMW M3 E46 3 Series LED Halo Rings 1

This LED BMW Angel Eyes Kit is 6 times brighter than conventional CCFL BMW Angel Eyes rings, with no blind point comparing with CCFL rings and awesome xenon white 7000K color. What’s more – this kit comes with all necessary brackets, double-sided tapes, etc. – completely plug and play with no modifications needed and will fit in several BMW models.

BMW M3 E46 3 Series LED Halo Rings 2

If you wonder how to install these pretty LED Halo Rings, then follow the steps. First open the hood and remove the corner lenses carefully. After that remove the weather stripping plastic above the headlight and the lower trim piece. Then you are ready to remove the headlight lens and the bezel around it.

BMW M3 E46 3 Series LED Halo Rings 3

The next thing you should to is to take the clips from the kit and attach them to the back of one LED Halo Ring. Once you are ready with this part, feed wires through headlight assembly holes and out the rubber grommet in back. After that you can use a screwdriver to gently open the clips and attach the ring to the headlight housing. Do the same process for the high beam light. Please note you have to leave sufficient clearance for projector movement!

BMW M3 E46 3 Series LED Halo Rings 4

Next up – wiring: Connect LED DriverPack wires to harness coming out of the headlight rubber grommet in back and tuck the DriverPacks away from heat and moisture. Then you are ready to reinstall the headlight bezel, lens, trim, weatherstripping and corner lenses.

BMW M3 E46 3 Series LED Halo Rings 5

Look for a small side cubby hole to bolt the relay. Then find the rubber seal covering the positive (+) terminal and route passenger side wiring underneath. Bolt positive ring terminal from harness to the positive terminal of the battery and bolt negative ring terminal from harness to negative terminal of the battery. Put back the rubber seal in place and connect harness ends to LED DriverPack.

BMW M3 E46 3 Series LED Halo Rings 6

Next, route driver side harness inside trim cover behind the engine, then underneath seal to DME cover and finally to driver side LED DriverPack. Connect terminals and remove the DME box cover. Here you have to find the +12V accessory wire (red/white with yellow dots). Once you are ready with this, splice supplied wire tap to +12V wire. Plug spade connector from harness into wire tap and put back the DME box cover.

Remove grommet from passenger side firewall, pierce hole through grommet and thread remote wire. Here you have to punch hole in carpet, route the wire through hole and reinstall grommet. Get in the car and remove passenger footwell light. Carefully reach inside and locate remote wire that you routed earlier. This is where you have to use the supplied wire tap on red/green wire for the remote fade in/out feature. The last step is to reinstall footwell light and test the BMW LED Halo Rings on your ride with the key remote. In case you have some questions regarding the installation process above, check out the detailed video on the product page or contact iJDMTOY.

This 2005 BMW M3 is a really mean machine, but with BMW LED Halo Rings from iJDMTOY, it looks completely different and awesome! If you are looking for something to make your bimmer hella cool, look no further! Go for it!

264-SMD LED BMW Angel Eyes Halo Rings Kit

Brought to you by iJDMTOY.com, the expert for your Car LED. Follow us on Facebook for exclusive promo codes.

Install the Cool E46 LED Angel Eyes on Your 2005 BMW 330i

2005 BMW 330i is surely a class apart car, which not only looks great from outside but also offers amazing comfort from inside and with these BMW E46 Angel eyes it looks simply irresistible. Just check out the pictures of 2005 BMW 330i with E46 LED Angel eyes and feel the difference. You will notice that these BMW E46 Angel eyes has complimented to the rugged and sporty look of 2005 BMW 330i very well.

BMW 330i E46 LED Angel Eyes 1

E46 LED Angel eyes are almost 6 times brighter than conventional CCFL Angel eyes than any other aftermarket Angel eyes. So, these lights are absolutely the right kind of upgrade for you if want your 2005 BMW 330i to get noticed by others. Apart from producing consistent bright lights, these BMW E46 Angel eyes also adds on beautiful and aesthetic appeal to your car.

BMW 330i E46 LED Angel Eyes 2

These E46 LED Angel eyes are designed to provide perfect fitment on 2000-03 BMW E46 3 series coupe and 1999-2004 BMW E46 3 series sedan models. Even the installation process is very simple as no additional wiring is required in order to install these dolls. All the necessary brackets, attachments along with double tapes are included in the kit so all you need to do is just plug them as per given instructions and enjoy. The kit also includes relay wiring harness, which allows you to use fade on and off by using a key or remote. Though installation is not at all difficult, but if you don’t want to take any chance then you can always contact iJDMTOY guys for assistance. However, if you follow the instruction correctly then you can get these dolls working in less than an hour.

BMW 330i E46 LED Angel Eyes 3

BMW E46 Angel eyes are certainly the best in class upgrade, which you can use to lighten the BMW E46 3 series headlights. The best part is that they look similar to all new 2011 and up BMW OEM high power Angel eyes. These E46 LED Angel eyes are made with good quality materials so they last much longer than conventional CCFL angel eyes. You can buy these extremely beautiful upgrades for your BMW E46 3 series for just $ 60 from iJDMTOY, which is a lot less as compared to other sellers in the market.

If you like to give your car a stand out of the car look then visit iJDMTOY.com for lots of exiting and low priced deals on aftermarket upgrades.

LED BMW Angel Eyes Halo Rings Kit

Brought to you by iJDMTOY.com, the expert for your Car LED. Follow us on Facebook for exclusive promo codes.

2009 BMW 650i – a Fabulous Pearl with LED BMW Angel Eyes

A 2009 BMW 650i and LED BMW Angel Eyes – a perfect visual symbiosis! This is what I call a real beauty – the fabulous pearly white bimmer is nothing, but awesome. You even might get shivers while looking at it only half shown from the dark garage with its LED BMW Angel Eyes switched on… No, this isn’t ad footage! This is the new LED product from iJDMTOY – The High Power BMW Angel Eyes H8 LED Ring Marker Bulbs

9005 LED DRL 1

Admit it – the 2009 BMW 650i is extremely stylish and beautiful car, but these new LED Angel Eyes took the ride into a whole new dimension! Style, appearance, impression – all of these got a whole new meaning when the stock dull yellow look was replaced with this nice xenon white HID matching look. The secret of the super bright rings is hidden in the revolutionary new design of the iJDMTOY’s 60-degree Wide Angle High Power H8 LED ring marker bulbs. To sum things up, what you get is a maximum lighting output to light up the BMW Angel Eyes much brighter! What’s more – each bulb is enough to power up two rings on each side.

9005 LED DRL 2

Let me tell you the best part – you can install this awesome LED product at your place in no time! Don’t worry – it is as easy as one, two, three. First make sure the engine is turned off and key is off, too. Then proceed and locate the angel eye ring bulb cap, open it and remove the stock H8 halogen bulbs. Take the clamp, included in the package and use it to fold the 60 degrees wide angle H8 LED bulb and install it back to the H8 housing. Next, connect the Wide Angle H8 Angel Eye Bulb to the Error Free Decoder and plug the decoder back to the stock harness. Finally, make sure the LED bulb is directly facing the Angel Eye Ring Tube Opening for maxima lighting performance. That’s it! Take some steps back and enjoy the new LED look of your BMW!

9005 LED DRL 3

Here we have a 2009 BMW 650i, but please note that these awesome BMW Angel Eyes will fit in other BMW models such as 2010 BMW 6 Series LCI version, E90 Sedan 2009 and up, E92 Coupe 2008 and up, E90 M3 2009 and up, E92 M3 2008 and up, E93 Convertible 2008 and up, etc. Make sure the BMW has factory equipped HID headlights, otherwise this kit won’t fit in. However, more models are compatible with this LED set, but for full list, check out the iJDMTOY online shop and look for this fantastic LED upgrade.

High Power LED BMW Angel Eyes H8 Ring Marker Bulbs

Brought to you by iJDMTOY.com, the expert for your Car LED. Follow us on Facebook for exclusive promo codes.

How To Install BMW E46 3 Series LED Tail Lights

Particular thanks to Bimmerfest Forum for the following magnificent installation guide.

Aftermarket LED Tail Lights 2

Before you start be certain you have 1-2 hours to dedicate to setting up these. They include resistor boxes and different wiring attached to them so you need to hide all this kind of stuff. The ONLY way to do it right is to remove the black trunk panel and both sides of the carpet lining (this particular might be folded back out of the way truly). Also before you start, simply unplug your factory lenses and plug in the new led ones to test to make sure everything features and you have no bulb out lights on the dash. Almost nothing worse than setting up an install and getting that the units were faulty to start with… yes it’s occured to me more than once with other items. Consequently here’s what you are starting with:

Aftermarket LED Tail Lights 2

First thing to do is to get rid of the tail lights you have on the car presently… there are actually just 3 nuts on the back, super easy. I won’t go into much detail about this particular. There are a lot of DIYs out there on this particular. Next pull out the trunk bottom carpet with the contoured black bottom thing. Subsequently pull back the trunk’s side carpets. If you have a friend you can certainly have him carry all those away from the way but I merely put something heavy in front of them so they couldn’t come forward. Currently you could begin removing the long black plastic liner on the back side of the trunk (shown in the bottom of the image at the incredibly back of the trunk). There are 4 screws below covers, and 5 push pin retainers if I keep in mind correctly. It genuinely allows you have one among all those interior clip/panel removers to move all the clips off, nevertheless it can be done with a screwdriver and some patience. Soon after you pull off the plastic panel you could start getting in the new LED tail lights.

FYI… mark all the clips with a sharpie or a little something so you remember which ones go to which. Don’t attempt to mount the lenses with all the guts hanging off the back of them… it will probably help to make your life quite difficult and frustrating, inquire how I know. Also you need to make use of the black trim things off your recent tail lights and shift them to your new ones. The quickest way I could do it was to insert a little flathead screwdriver between and pry up slowly. You may possibly try spraying WD-40 on the fins that clip and then sliding it off… but I don’t know how well that would certainly work. I went with the screwdriver. Having these kinds of off your old lights and onto your new LED tail lights is likely the hardest part apart from yanking all the panels off the automobile. You can easily discover the black trim I am talking about on the exterior of the trunk on the left side of the graphic. Oh ya when you are installing the aftermarket tail lights really don’t put that third nut on the bolt right until you are willing to deploy the black panel back into the automobile. You could see I only have 2 of them on in the photo… the other you ought to put on after the black panel is on.

Aftermarket LED Tail Lights 3

Aftermarket LED Tail Lights 4

As soon as you get the LED tail lights in you could reattach all the guts to the back of them. Simply match the plugs you marked in the beginning. Appears like plenty of crap right? Well it is… along with it would certainly have been nice of the manufacturer to leave more wire at the aftermarket tail lights side so you may tuck and hide everything easier. Well, they didn’t… so you are stuck installing the boxes where I did… that small cubby beneath the lights that you find all the wires going into in the photo underneath. All 3 boxes are in there and match perfectly. Today plug in the lights and test all the performs again. Furthermore aim to attach the interior trunk light to the back of the light. This takes awhile to tuck all the wires somehow that it doesn’t interfere with the light. Although far better to do it now than when all your panels are going back on and in the way. The moment you obtain almost everything where you need it… time to put all those panels back on. This particular is self informative so I won’t get into that.

Right now you’re done, stand back and take pleasure in your new younger searching Bimmer… listed below are a bunch of my accomplished install photographs. Since for a full review… I am VERY satisfied with the LED tail lights. They are every bit as bright as the OEM ones and function just as well so far.

Aftermarket LED Tail Lights 5

Aftermarket LED Tail Lights 6

Aftermarket LED Tail Lights 7

Aftermarket LED Tail Lights 8

Halo Projector Headlights and LED Tail Lights

Introducing iJDMTOY’s new products for projector headlights, and LED tail lights.